Installing PHP on Ubuntu 24.04 doesn’t have to be a guessing game. If you're setting up a VPS for development or production, getting the right PHP version is critical for performance, security, and compatibility. While Ubuntu’s default repositories often lag behind, there’s a reliable way to install and manage modern PHP versions directly from the command line. In this guide, you’ll learn how to properly install PHP 8.4 on Ubuntu 24.04, add essential extensions, and integrate with Apache or Nginx — without breaking dependencies or compromising stability. Whether you’re running a single site or managing multiple PHP versions, we’ll walk through each step with precision.
Step 1 – Add the Ondrej PHP Repository
Before you can install modern PHP versions like 8.1, 8.3, or 8.4 on Ubuntu 24.04, you need access to updated packages. The default Ubuntu repositories often ship with older PHP versions that may no longer be supported or lack the features you need. That’s where the Ondrej PHP PPA comes in.
This widely trusted repository is maintained by Ondřej Surý, a key contributor to PHP packaging in Debian and Ubuntu. It’s the go-to source for up-to-date, secure, and well-tested PHP builds. To add it, first ensure you have the software-properties-common package installed, which provides the add-apt-repository tool:
Once installed, add the Ondrej PHP PPA with this command:
This registers the repository and imports its GPG key, so APT can verify package authenticity. After adding the PPA, update your local package index to pull in the latest list of available PHP versions and extensions:
Now your system is ready to install any supported PHP version from a single, reliable source. This step only needs to be done once — afterward, you can install, switch between, or even run multiple PHP versions side by side without conflicts.
Step 2 – Install PHP 8.4 on Ubuntu
With the Ondrej PHP repository in place, installing PHP 8.4 becomes straightforward. Run a single command, and APT handles the rest — dependencies, configuration files, and core setup. The php8.4 package includes the runtime and essential components, making it ideal for both command-line scripting and web-based applications. You can start with just the CLI for testing or automation, or install additional modules later for full server integration. This step sets the foundation for a clean, modern PHP environment on Ubuntu 24.04 — fast, secure, and ready to scale.
Install PHP-CLI Only
If you're setting up a server purely for command-line tasks — like running Composer, Laravel Artisan commands, or scheduled cron jobs — you don’t need a full PHP stack. Installing just the CLI component keeps the system lean and avoids pulling in unused web server modules. To install only the PHP 8.4 command-line interface, run:
This installs the PHP interpreter with core extensions enabled, giving you full scripting capability without bloat. It’s perfect for headless environments, background workers, or CI/CD runners where performance and minimal footprint matter. Once installed, verify it works by checking the version:
You’ll see output confirming PHP 8.4 is active. From here, you can run scripts directly, use package managers like Composer, or integrate into automation tools — no extra layers, no overhead. It’s standalone PHP, exactly where and how you need it.

PHP-CLI and PHP as an Apache Module
If your Ubuntu server runs Apache and you need to serve dynamic PHP content, installing PHP as an Apache module is the most straightforward approach. This setup embeds PHP directly into the web server process, allowing Apache to execute .php files natively without relying on external handlers.
To enable PHP 8.4 with Apache, install the dedicated module package:
This package — commonly referred to as mod_php — loads PHP into Apache’s memory space, giving you tight integration and solid performance for traditional web workloads. Once installed, Apache automatically recognizes .php files and processes them using the PHP 8.4 interpreter.
After installation, restart the web server to load the module:
No manual configuration is needed for basic operation — Apache will begin serving PHP scripts from your document root immediately. This method is ideal for standard LAMP stack deployments where simplicity and compatibility are priorities. Just keep in mind: running PHP as a module ties its lifecycle to Apache, so each request runs under the same process space. For high-traffic or security-sensitive environments, consider PHP-FPM as a more flexible alternative — we’ll cover that next.
PHP CLI and PHP-FPM (Recommended for Nginx)
When running Nginx — or aiming for a high-performance, scalable PHP setup — PHP-FPM is the way to go. Unlike Apache’s embedded module, Nginx doesn’t process PHP internally. Instead, it delegates that work to an external FastCGI handler, and PHP-FPM is the most efficient option available.
To install PHP 8.4 with FPM support, run:
This command installs both the PHP CLI and the FastCGI Process Manager, which runs PHP as a standalone service. PHP-FPM manages a pool of worker processes, dynamically adjusting based on demand. This leads to better resource utilization, faster response times under load, and more granular control over process limits, timeouts, and user permissions.
Once installed, the service starts automatically and listens on a Unix socket (or TCP, if configured). Nginx communicates with it through the fastcgi_pass directive in server blocks, forwarding PHP requests while handling static content directly.
To ensure everything runs smoothly:
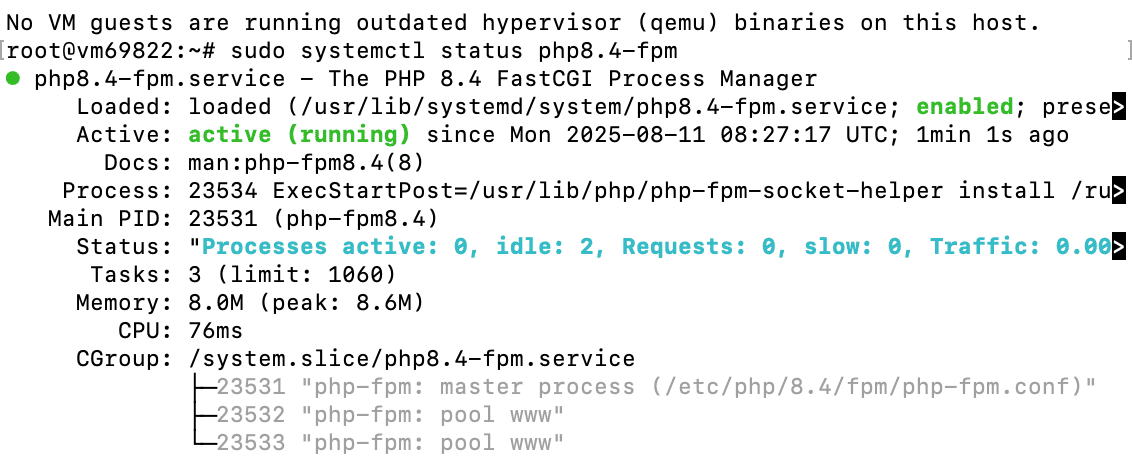
You’ll see the service is active and ready. Nginx will typically point to /run/php/php8.4-fpm.sock in its configuration. After updating your site’s server block, reload Nginx:
PHP-FPM is the standard for modern deployments — especially with Nginx, Docker, or load-balanced environments. It’s more secure, more efficient, and built for production. If you’re not tied to Apache, this should be your default choice.
Install PHP Extensions
Once PHP is installed and running, the next critical step is adding the right extensions. The core PHP package doesn’t include everything your applications need — frameworks like Laravel, content management systems like WordPress, and custom web apps rely heavily on extensions to handle databases, HTTP requests, image processing, and more.
The Ondrej PPA makes this easy: each extension is packaged under a consistent naming scheme — php8.4-extension-name — and can be installed via APT with no compilation required.
Here are the most commonly used extensions and what they do:
| Extensions | Purpose |
|---|---|
| php8.4-mysql | Enables MySQL and MariaDB connectivity |
| php8.4-pgsql | Adds PostgreSQL support |
| php8.4-curl | Required for HTTP requests (e.g., APIs, Guzzle) |
| php8.4-gd | Image manipulation (thumbnails, watermarks) |
| php8.4-zip | Create and extract ZIP archives |
| php8.4-xml | XML parsing and DOM manipulation |
| php8.4-mbstring | Multibyte string support (essential for UTF-8) |
| php8.4-json | JSON encoding/decoding (usually pre-installed) |
| php8.4-bcmath | Arbitrary precision math (common in e-commerce) |
| php8.4-intl | Internationalization (date, number, and currency formatting) |
To install them in one go:
After installation, Apache must reload to load the new modules. For Apache (if using libapache2-mod-php):
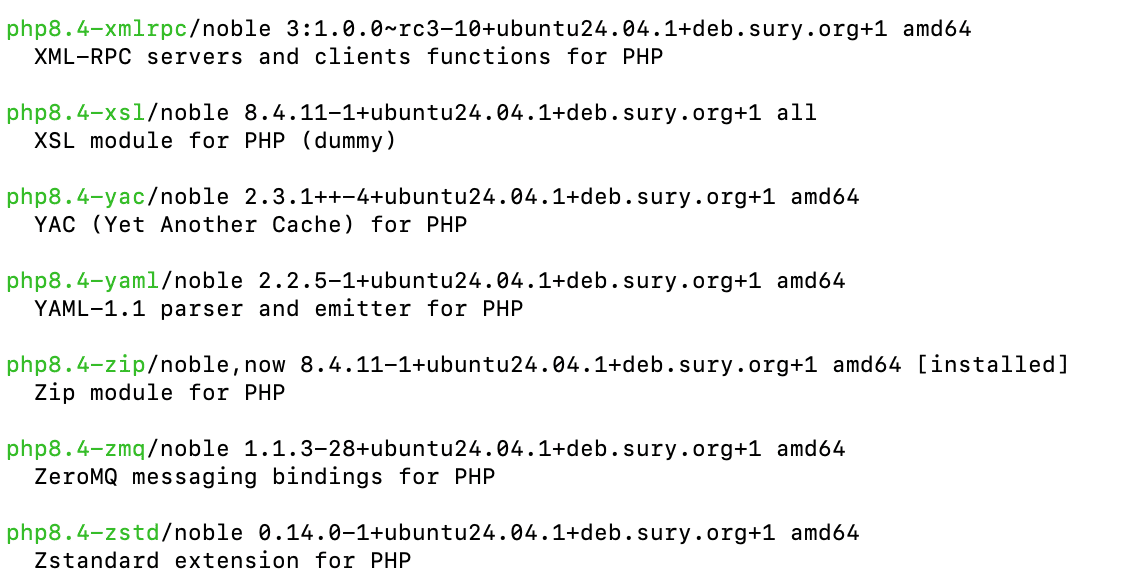
To see what’s currently available, use:
This lists all PHP 8.4-related packages in the repository — handy when you’re debugging a missing function or adding niche support like LDAP or Redis.
Don’t skip this step. Missing an extension can cause silent failures or fatal errors in your app. Install the right ones upfront, and you’ll save hours of troubleshooting later.
How to Uninstall PHP on Ubuntu
If you need to remove PHP completely — whether for a clean reinstall, version rollback, or decommissioning a server — it’s important to do it thoroughly. Simply removing the main package leaves behind extensions, config files, and dependencies that can cause conflicts later.
Start by purging all PHP 8.4 packages:
This removes the core interpreter, CLI, FPM (if installed), and all extensions. The purge command is key — it deletes configuration files in /etc/php/ along with the binaries, unlike remove, which leaves configs behind.
Next, if you no longer need the Ondrej PHP repository, remove it to prevent accidental reinstalls or repo conflicts:
Then, clean up leftover dependencies that were installed with PHP but are no longer used:
This removes libraries like libapache2-mod-php8.4 or PHP-specific runtime components that aren’t required by other software.
Finally, verify removal by checking PHP’s version:
If nothing returns, you’re clean. The system is back to a PHP-free state, ready for a fresh setup or migration to another stack.
Conclusion
Setting up PHP on Ubuntu doesn’t have to be trial and error. With the right repository, proper configuration, and a clear understanding of your stack, you can deploy PHP 8.4 — or manage multiple versions — efficiently and securely. We walked through adding the Ondrej PPA, installing PHP for CLI, Apache, and Nginx with PHP-FPM, fine-tuning process pools, and installing essential extensions. We also covered clean removal when needed. These steps follow real-world best practices used in production environments, balancing performance, security, and maintainability.
Whether you're building a Laravel app, hosting WordPress, or managing a high-traffic API, this setup gives you control without unnecessary complexity. The key is consistency: use trusted sources, configure deliberately, and always test after changes. Now you’re equipped to install, configure, and manage PHP on Ubuntu 24.04 the way experienced sysadmins and DevOps engineers do — not just making it work, but making it right.