Docker has revolutionized the way developers build, ship, and run applications — and if you're using Ubuntu, you're already on one of the best platforms to take advantage of it. In this article, we’ll walk through everything you need to know to install Docker on Ubuntu quickly and securely. Whether you're a seasoned developer or just getting started with containerization, by the end of this guide, you'll have Docker up and running and be ready to start experimenting with containers and images using essential Docker commands. Let’s dive in.

What is Docker?
Docker is an open-source platform that automates the deployment and management of applications inside isolated environments called containers. Unlike traditional virtualization, which emulates entire operating systems, Docker uses lightweight containers that share the host system’s kernel — making them faster and more resource-efficient.
With Docker, developers can build once and run anywhere, ensuring consistency across different environments. It simplifies application deployment, improves scalability, and supports modern DevOps practices.
Key components include images (templates for creating containers), Dockerfile (a recipe for building images), and Docker Compose (for managing multi-container applications). Whether you're developing microservices or deploying cloud-native apps, Docker makes it easier to work with containerization at any scale.
Installing Docker on Ubuntu VPS: Step-by-Step Guide
Step 1: Order Your Ubuntu VPS
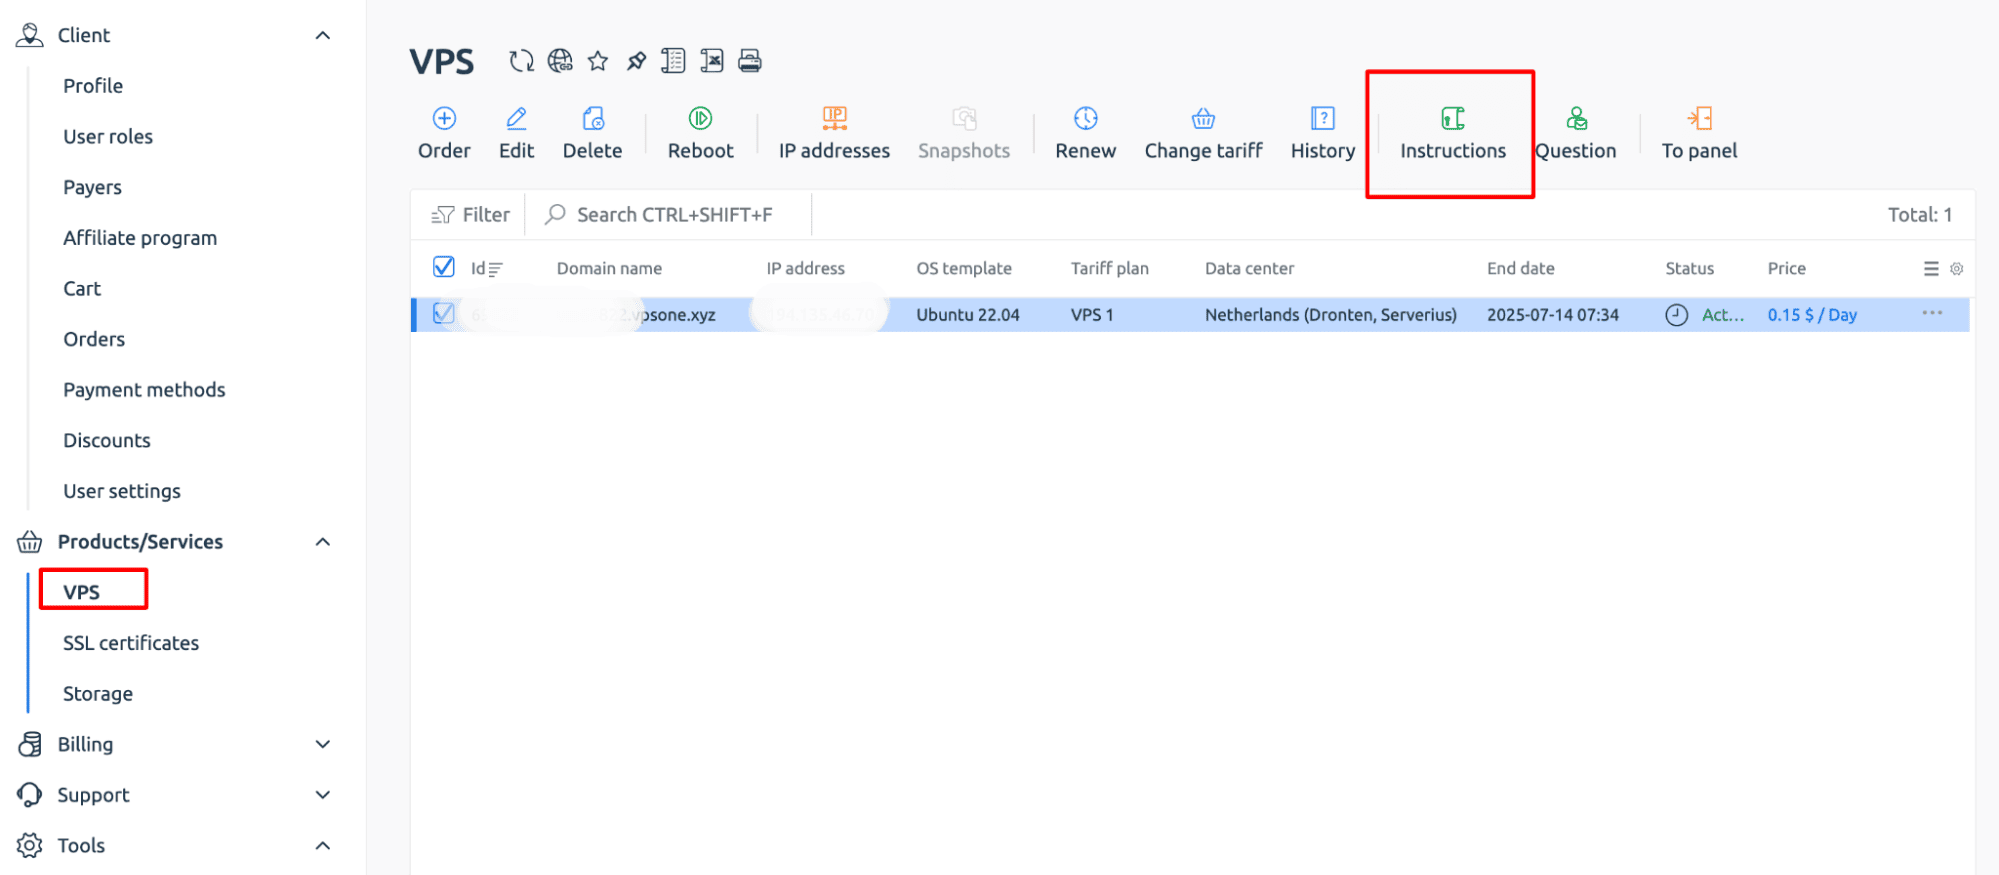
To get started, log in to the billing system, navigate to the "VPS" section, and click "Order" to select and configure your Ubuntu 22.04 server.
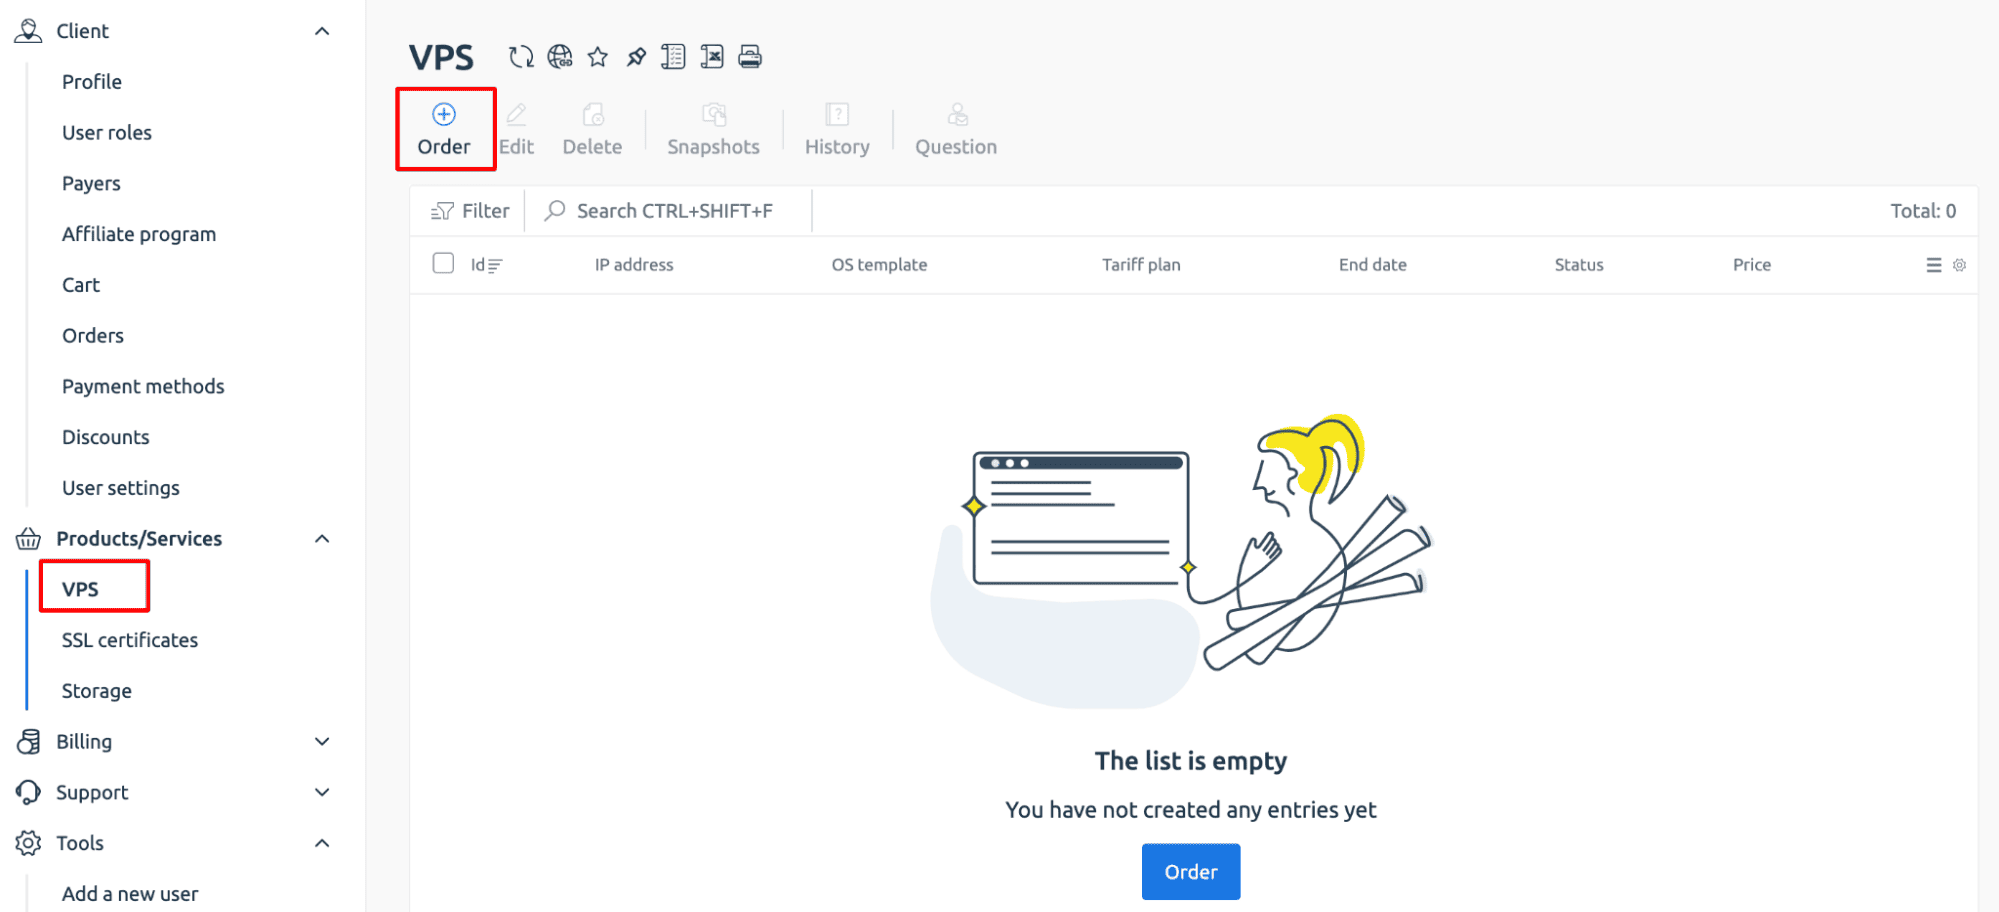
After clicking "Order," the user selects a pricing plan that fits their needs. This includes choosing server resources like CPU, RAM, storage, and location. Once the plan is selected, they proceed to checkout and deploy the Ubuntu VPS.

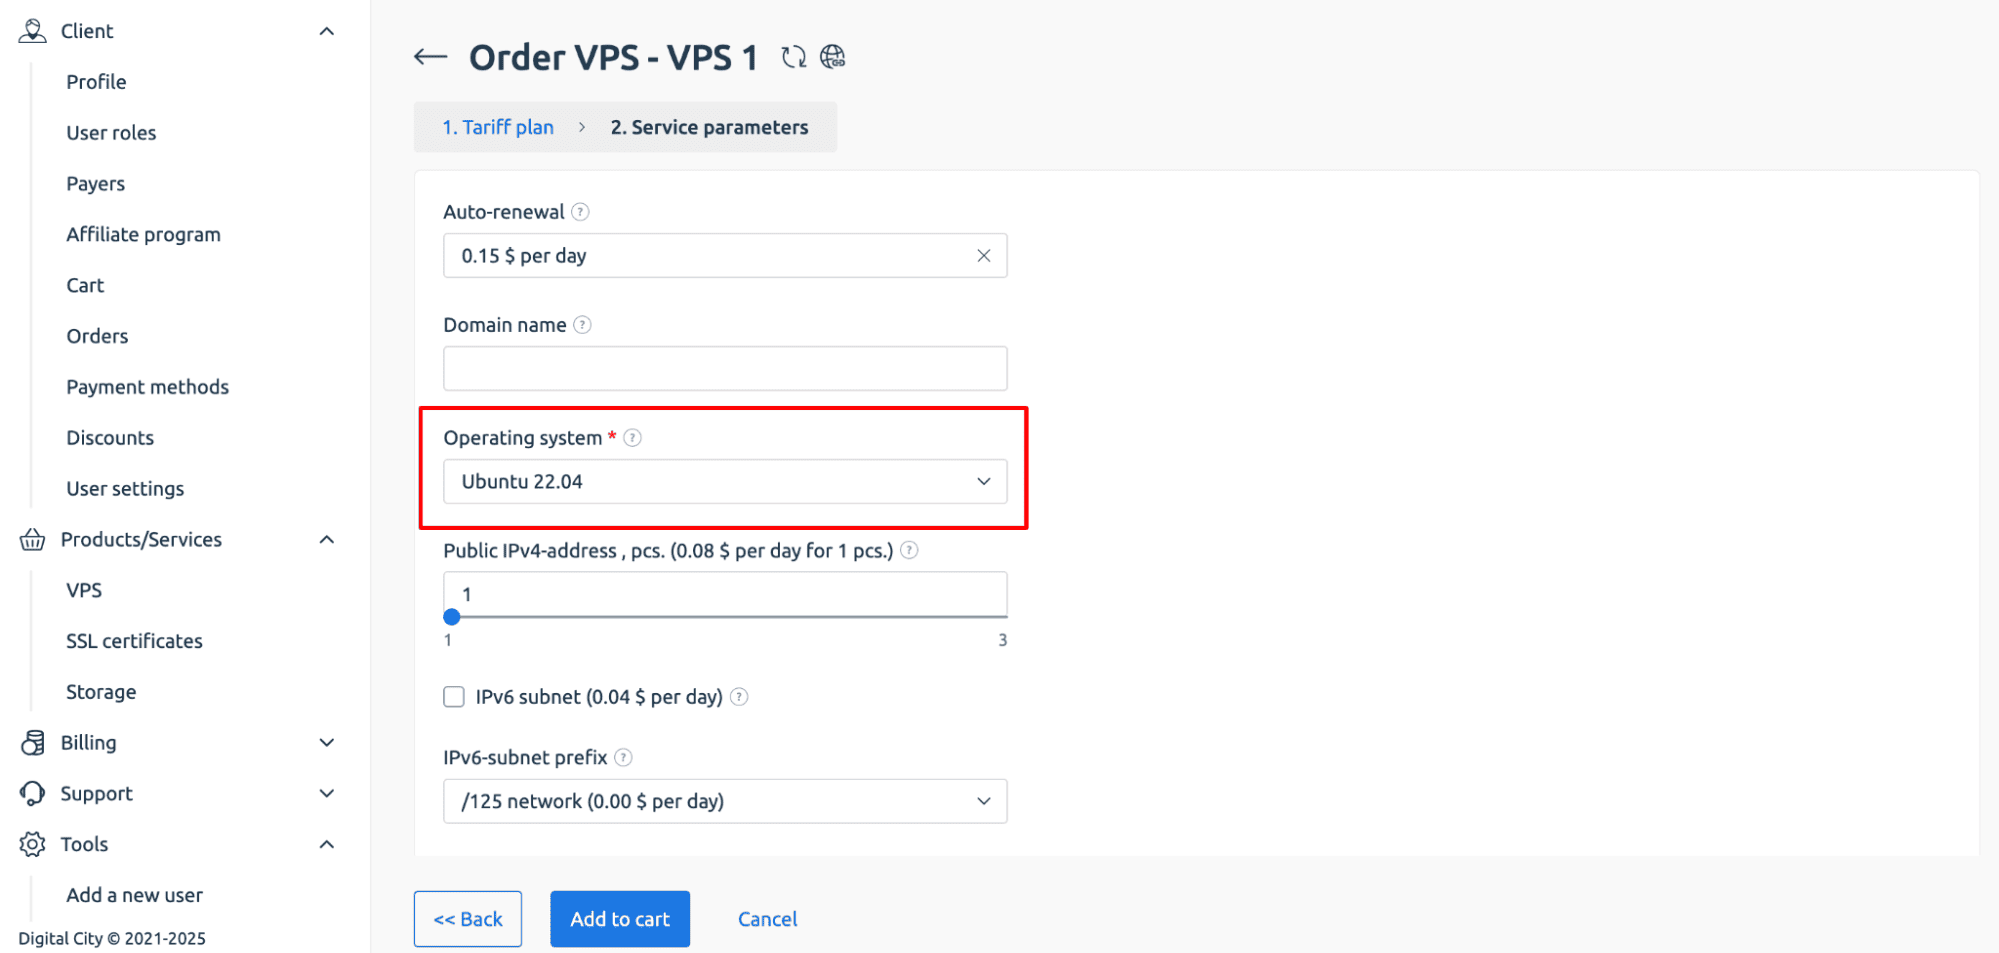
Next, choose the desired software in the "Operating System" field, making sure to select Ubuntu 22.04. If needed, enter your domain name in the appropriate field to link it to the server during setup.
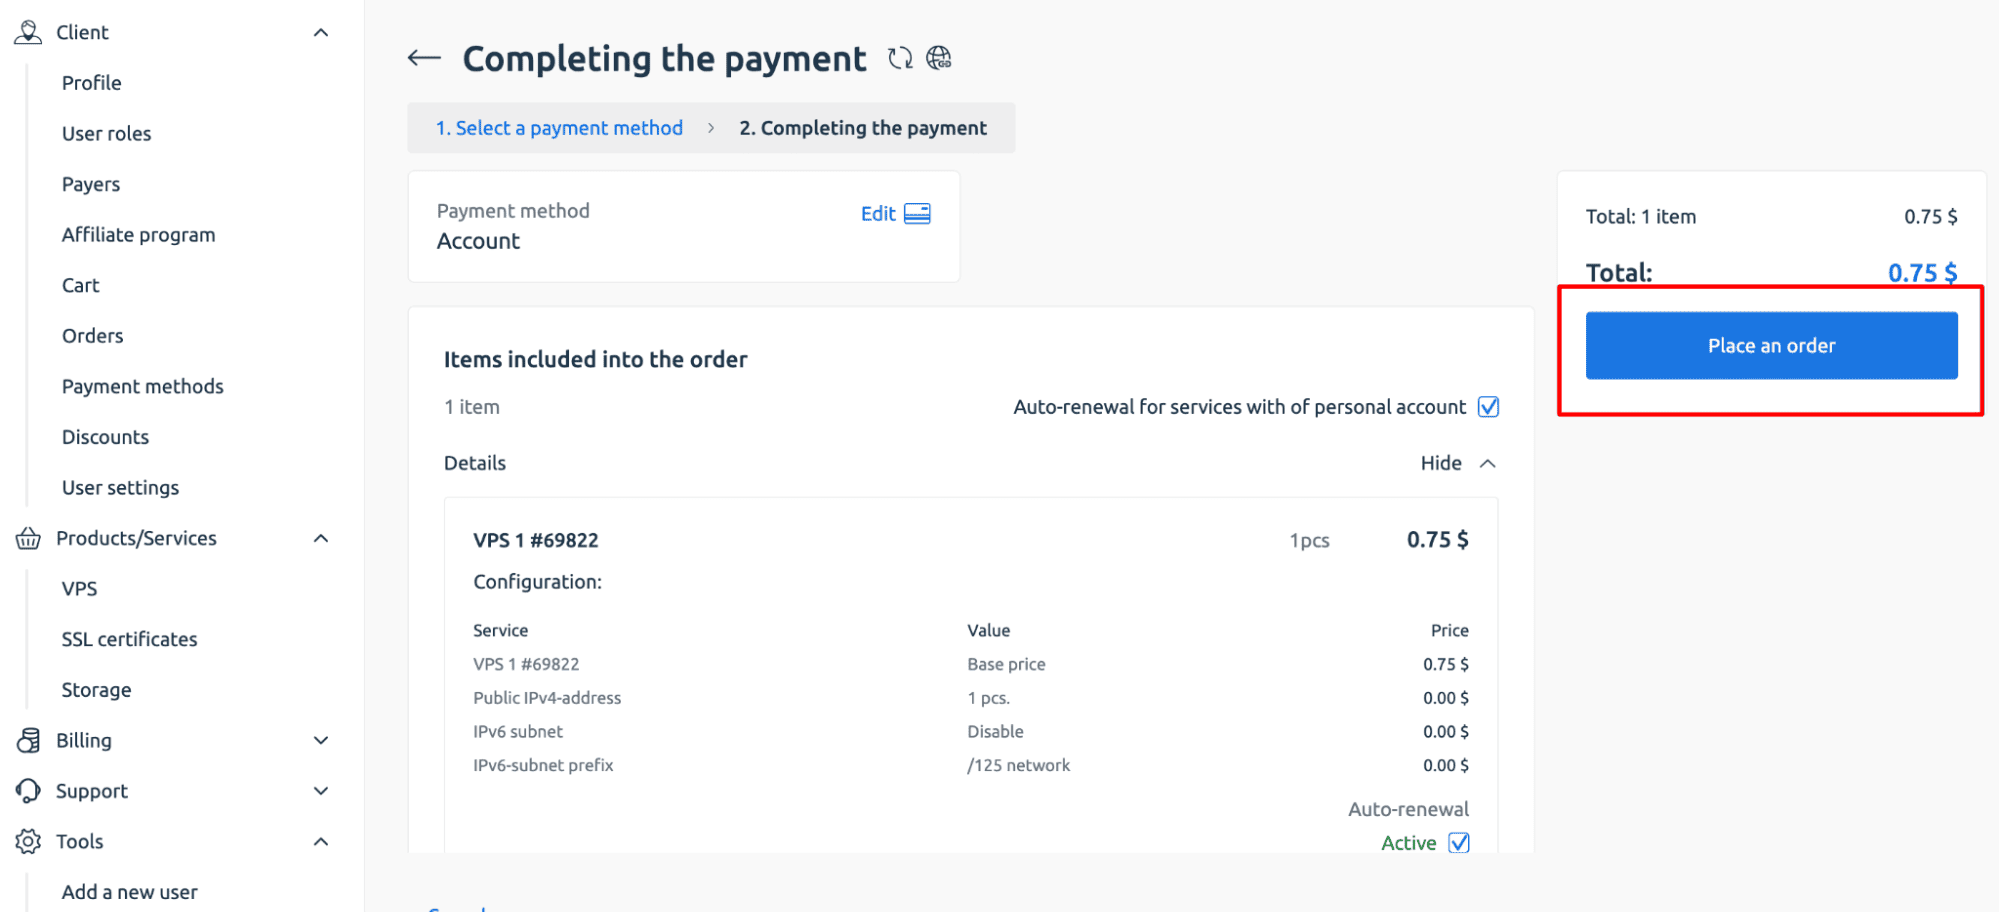
After selecting the OS, proceed to pay for your order using the available payment method. Once the payment is confirmed, wait a few minutes for the VPS to be activated and deployed automatically by the system.
Once the server is activated, login credentials will be sent to your email and can also be found in the "Instructions" section of your control panel. These details include the server IP, username, and password.
Great! Your VPS is now active, and the Ubuntu server is ready to go. You're all set to move on to the next step: installing Docker.
Step 2: Connecting to a VPS server
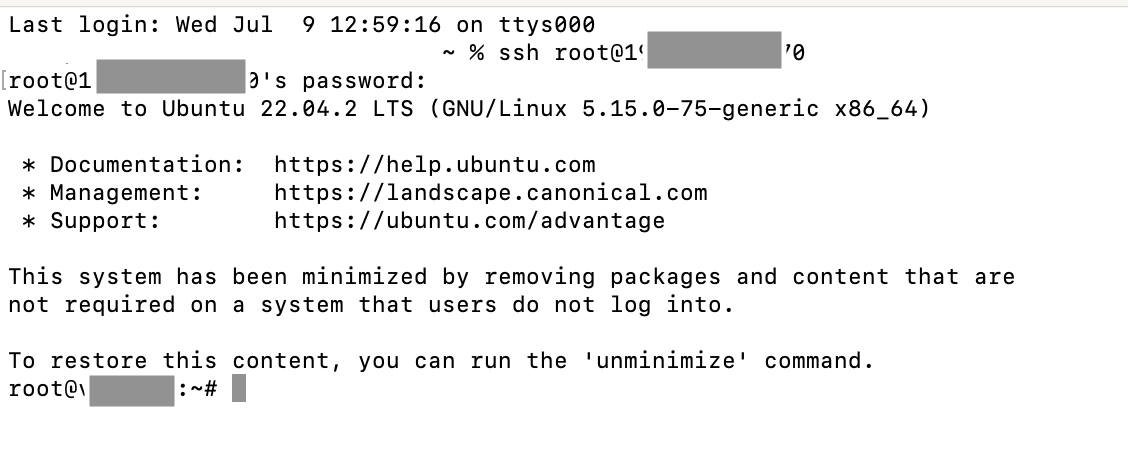
To connect to your VPS, open the terminal on your computer and use the SSH command:
Enter the following data:
- username - the username from the instructions;
- server_ip_address - the server IP address from the instructions.

On first connection, you may need to accept the server’s SSH key by typing yes. After entering the SSH command, you'll be prompted to type the server password from your instructions or email. Don’t worry if it doesn’t appear on the screen as you type — this is normal behavior for security reasons. Just enter it carefully and press Enter.
Now that you're logged in, it's time to start the Docker installation process.
Step 3. Update apt Package Indexes
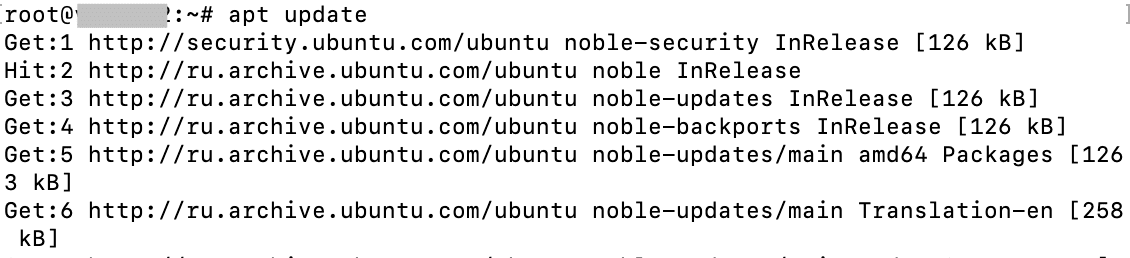
Before installing Docker, it’s important to refresh your system’s package index to ensure you’re pulling the latest versions of software from external repositories. The default Ubuntu repositories often don’t carry the most recent Docker releases, so we’ll be adding Docker’s official repository to get the latest and greatest version. Start by updating your apt indexes with this command:
Step 4. Install Required Packages
Before adding Docker’s repository, you’ll need to install a few helper packages to ensure everything runs smoothly. These tools enable your system to securely fetch packages over HTTPS and manage software repositories. Run the following command to install them:
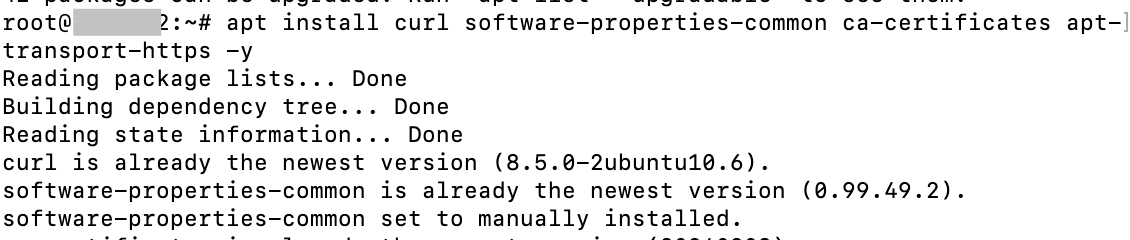
These packages — curl, software-properties-common, ca-certificates, and apt-transport-https — are essential for downloading and verifying Docker’s repository and packages securely. With them in place, you're ready to move on to the next step.
Step 5. Import the GPG Key
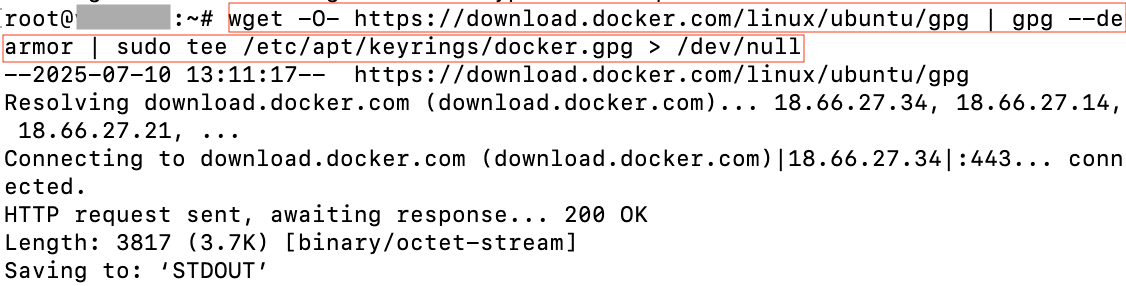
To ensure the integrity and authenticity of the Docker packages you’re about to install, you’ll need to add Docker’s official GPG key. This key allows your system to verify that the software you download from Docker’s repository is legitimate and hasn’t been tampered with. Run this command to import the key:
Step 6. Add the Docker Repository
Now that the GPG key is in place, it's time to add Docker’s official repository to your system. We'll use the jammy release name, which corresponds to Ubuntu 22.04 LTS. If you're using a different version of Ubuntu, replace "jammy" with its respective codename. Run this command:

Step 7. Update Package Indexes Again
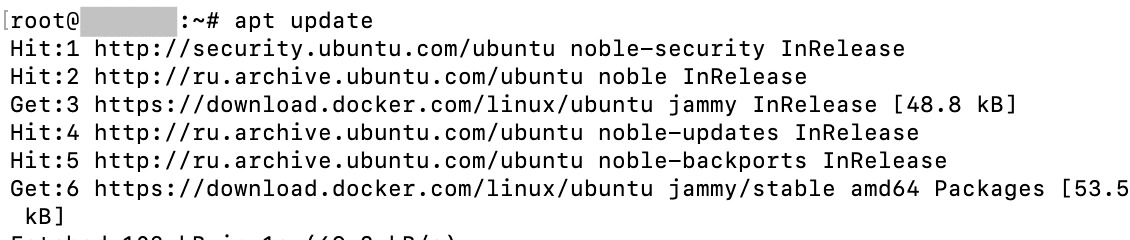
With Docker’s repository added and the GPG key verified, it’s time to refresh your package list one more time. This ensures your system recognizes the newly added Docker repository and the packages it contains. Run the familiar command:
Step 8. Verify the Repository
Before installing Docker, let’s confirm that the system is set up to pull from the correct repository. This helps ensure you're getting the official Docker packages and not outdated versions from default Ubuntu sources. Run this command:
What should be displayed:
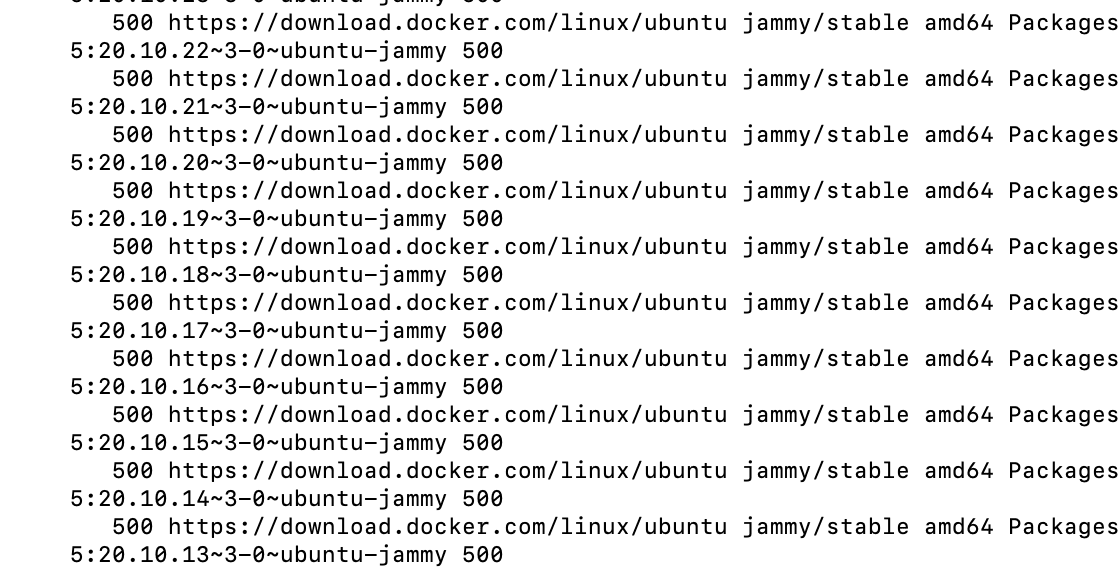
While the exact version numbers may vary over time, the important thing is seeing the Docker repo listed — ensuring you're getting the latest stable release directly from Docker’s servers.
Step 9. Install Docker
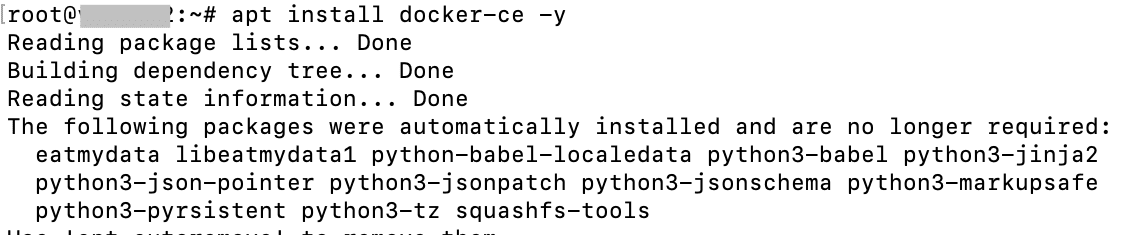
With the repository configured and verified, you're now ready to install Docker Engine. Run the following command to install the latest version of Docker CE (Community Edition):
Step 10. Confirm the Installation Was Successful
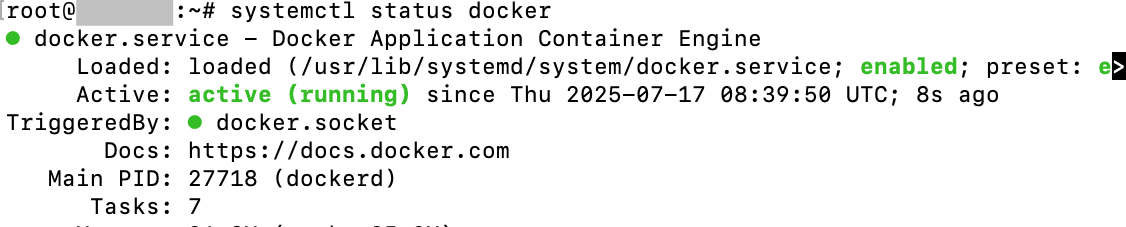
Now that Docker is installed, let’s verify it’s running properly. Check Docker’s status with this command:
If the installation was successful, you’ll see an active (running) status.
Test Docker Installation
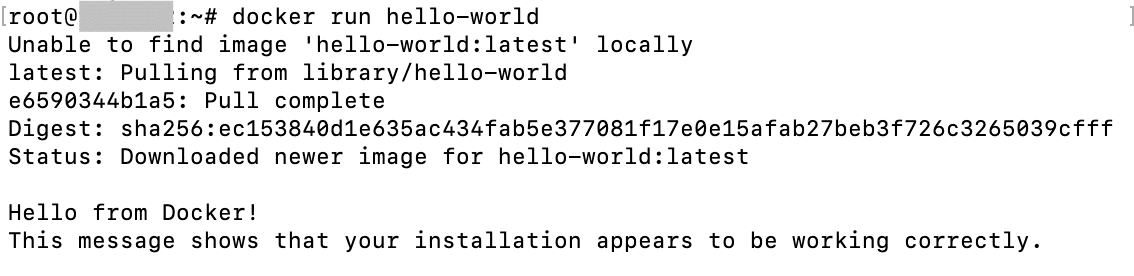
Now that Docker is installed and running, it’s time to verify that everything works as expected. The simplest way to do this is by running the official hello-world test container. This image is designed to pull down and run a minimal Docker container that outputs a success message — proving your Docker installation is working correctly and the daemon is ready to manage containers.
Run the test with this command:
If you see a message indicating that the container ran successfully, congratulations — Docker is installed and operational on your Ubuntu system.
How to Uninstall Docker on Ubuntu
-
If you need to remove Docker from your Ubuntu system, it's important to clean up not just the packages, but also configurations, images, and containers. Start by removing the Docker packages with:
-
Next, delete all Docker-related files and directories, including containers, volumes, networks, and the local image cache:
-
Finally, remove the Docker repository from your sources:
Frequently Asked Questions
What is the best way to install Docker on Ubuntu?
Using the official Docker repository ensures you get the latest stable version and updates.
Do I need sudo to run Docker commands?
Not if your user is added to the docker group.
What's the difference between Docker and Docker Compose?
Docker runs individual containers; Docker Compose manages multi-container apps via a YAML config.
Is Docker Desktop available for Ubuntu, and should I use it?
Yes, Docker Desktop is available in Beta and provides a GUI. It's optional; use it if preferred.
Conclusion
Congratulations — you’ve successfully installed Docker on Ubuntu and taken the first step into the world of containerization. You now have a solid foundation to start building, running, and managing containers for development, testing, or deployment. To continue your Docker journey, consider exploring Docker Compose for managing multi-container applications, or dive into Docker Hub to discover thousands of pre-built images. For deeper learning, check out the official Docker documentation and community forums.
Whether you're building microservices, experimenting with CI/CD pipelines, or just isolating application environments, Docker gives you the tools to do it efficiently. Now that everything is set up, it’s time to start creating!