If you're looking for a way to boost your online privacy, secure your internet traffic, or bypass geo-restrictions, setting up your own Virtual Private Network (VPN) on a VPS is a powerful and cost-effective solution. This step-by-step guide will walk you through installing and configuring an OpenVPN server on a Virtual Private Server (VPS) running Ubuntu — one of the most popular Linux distributions for hosting services. By the end of this tutorial, you'll have your very own private, encrypted tunnel for secure browsing from anywhere in the world.
Whether you're new to networking or a seasoned developer brushing up on sysadmin skills, this article keeps things clear and practical. No need to rely on third-party services — take control of your data with your own self-hosted VPN. Let’s get started.
How to Create a VPN on a VPS: Step-by-Step Guide
Setting up your own VPN on a VPS gives you full control over your network security and privacy. It’s a smart choice for developers, remote workers, or anyone who values online freedom without relying on third-party services.
In this guide, we’ll walk you through the entire process of turning a basic Ubuntu VPS into a fully functional OpenVPN server. You don’t need to be a networking expert — just follow the steps, and you’ll have a secure, encrypted connection up and running in no time. We’ll start with the basics: accessing your server, installing the necessary tools, and configuring OpenVPN. Then, we’ll dive into generating keys, setting up client devices, and testing your new private network. Let’s roll up our sleeves and begin building your own personal VPN.
Step 1: Choose Your Operating System
When setting up a VPN on your VPS, choosing the right operating system is crucial — and Ubuntu is one of the best options available. Known for its stability, security, and wide software compatibility, Ubuntu works seamlessly with OpenVPN, making the setup process much smoother. Most VPS providers let you select your OS during the server creation process. Simply pick a recent long-term support (LTS) version of Ubuntu — it's well-maintained, secure, and ideal for hosting services like a VPN.
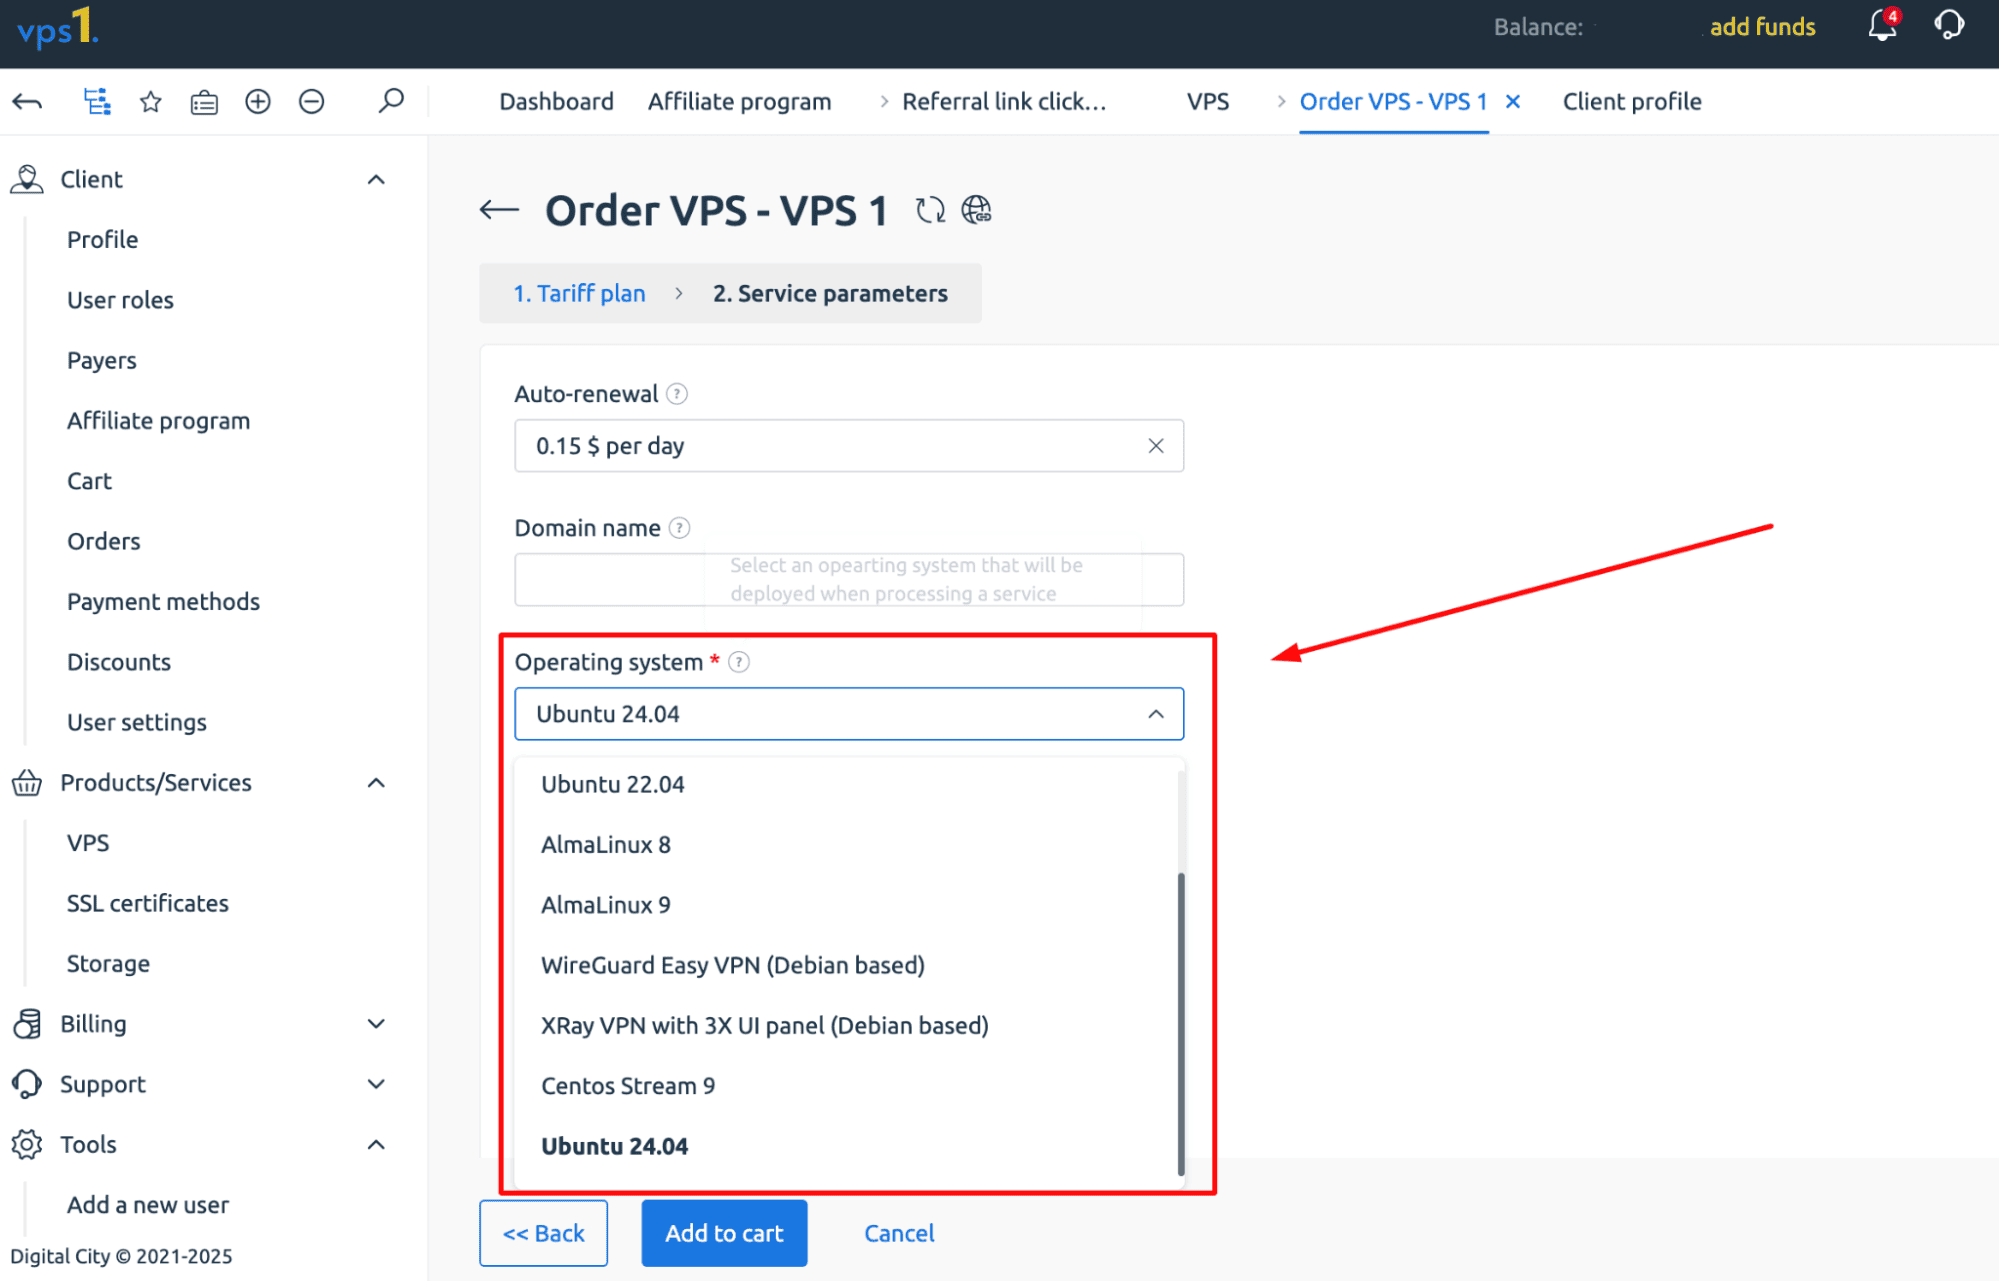
Ubuntu’s popularity also means you’ll benefit from extensive community support, detailed documentation, and regular updates. Whether you're a beginner or an experienced sysadmin, having a reliable OS like Ubuntu under your VPN gives you a solid foundation to build on — without unnecessary headaches. So before you dive into the setup, make sure your VPS is running Ubuntu. It’s the first and one of the most important decisions in the process.
Step 2: Connect to the Server via SSH
Once your VPS is up and running with Ubuntu, the next step is to access it — and the most secure, reliable way to do that is through SSH (Secure Shell).
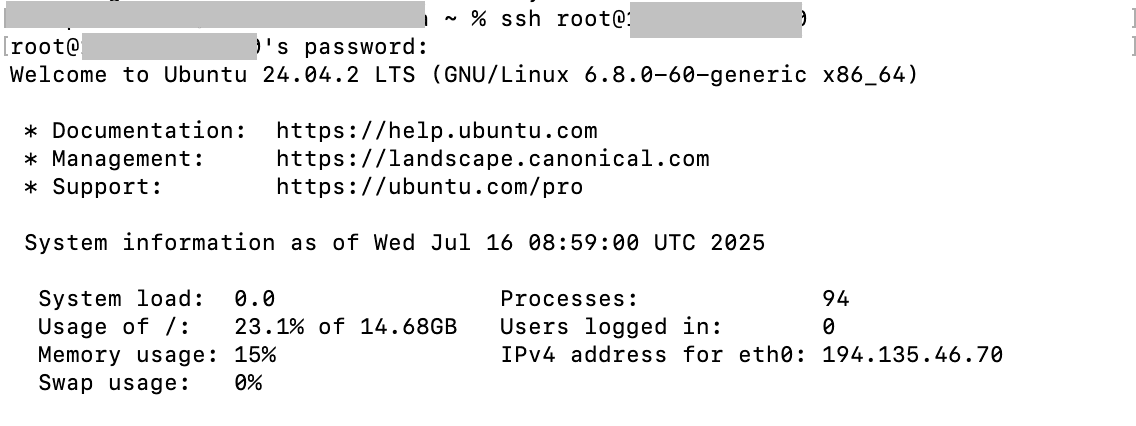
If you're on Linux or macOS, open your terminal and type:
Replace `username` with your actual username (often `root` or `ubuntu`, depending on your provider) and `your_server_ip` with the public IP address of your VPS. Hit Enter, and you’ll be prompted to enter your password or use an SSH key if one is configured.
For Windows users, PuTTY is a popular free tool for SSH connections. Download and launch PuTTY, enter your server’s IP address under the "Host Name (or IP address)" field, set the port to `22`, and choose "SSH". Click "Open" to start the connection. When prompted, enter your login credentials just like in the terminal.
Once connected, you’ll be inside your VPS server’s command line — ready to start installing and configuring OpenVPN.
Step 3: Installing and Configuring OpenVPN
Now that you're logged into your Ubuntu VPS, it's time to install and configure OpenVPN — the core component of your private VPN server. To simplify the setup, we’ll use a popular automated script created by Nyr, which handles everything from generating certificates to configuring the server. Run the installer with these commands:
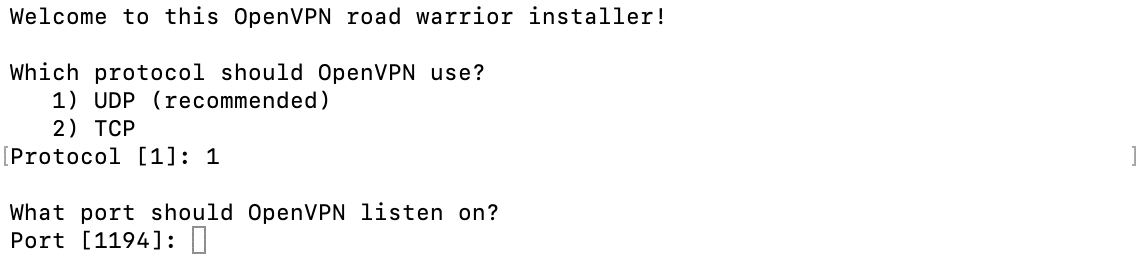
The script will start and immediately ask a few configuration questions. Here's what to do:
-
Protocol selection. When asked "Which protocol should OpenVPN use? , type 1 and press Enter to select UDP, which is generally faster and more reliable for most users.

-
Port selection. At the prompt "What port should OpenVPN listen on?", just press Enter to accept the default port 1194, the standard for OpenVPN.
-
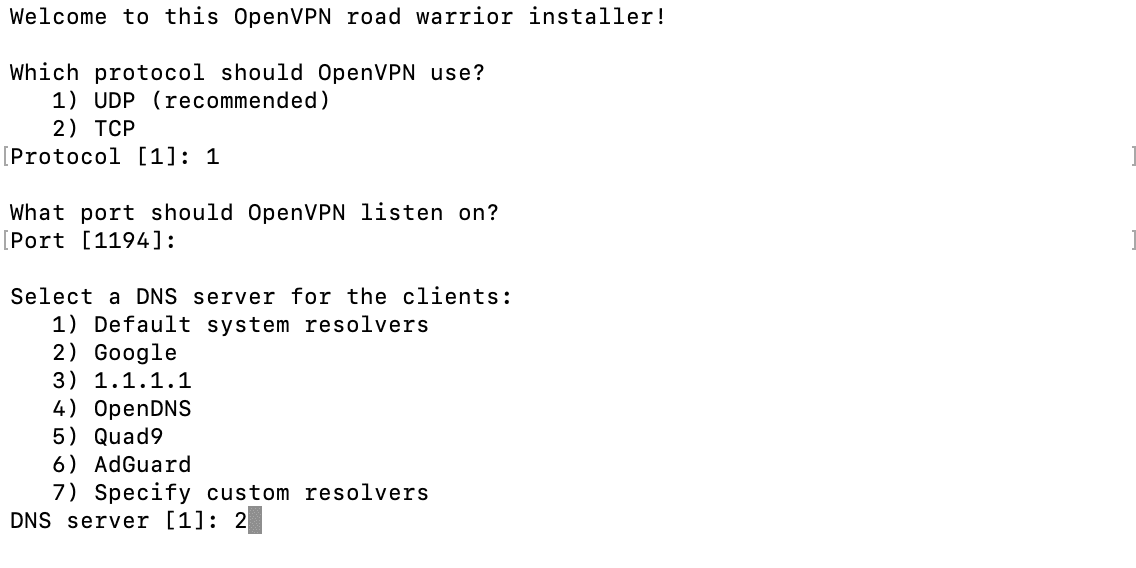
DNS server. When prompted "Select a DNS server for the clients", choose 2 for Google DNS (or any other option you prefer). This sets up a fast and reliable DNS for your VPN users.
-
Client name. Finally, enter a name for your first client — something like mydevice or work-laptop. This name will be used to identify the generated configuration file.
- Once you confirm your choices, the script will automatically install OpenVPN, generate certificates, and configure the firewall and routing rules.


After a few moments, your OpenVPN server will be up and running. You’ll also get a .ovpn configuration file that you can download and use to connect from your desktop or mobile device. You're now ready to connect securely through your very own private network.
Step 4: Download the Configuration File via an FTP Client
Once you’ve installed and configured OpenVPN using the setup script, it will generate a client configuration file — in our case, it is called vpsone.ovpn.. This file contains all the necessary settings and encryption keys to connect to your new VPN server.
To access this file from your local machine, you can use an FTP client like FileZilla — a free, open-source tool that works on Windows, macOS, and Linux. You can download it from the official website.
To connect to your VPS using FileZilla:
- Launch FileZilla and enter your VPS IP address in the "Host" field (enter sftp://your_server_ip).
- Use the same username and password you use for SSH access.
- Click Quickconnect.

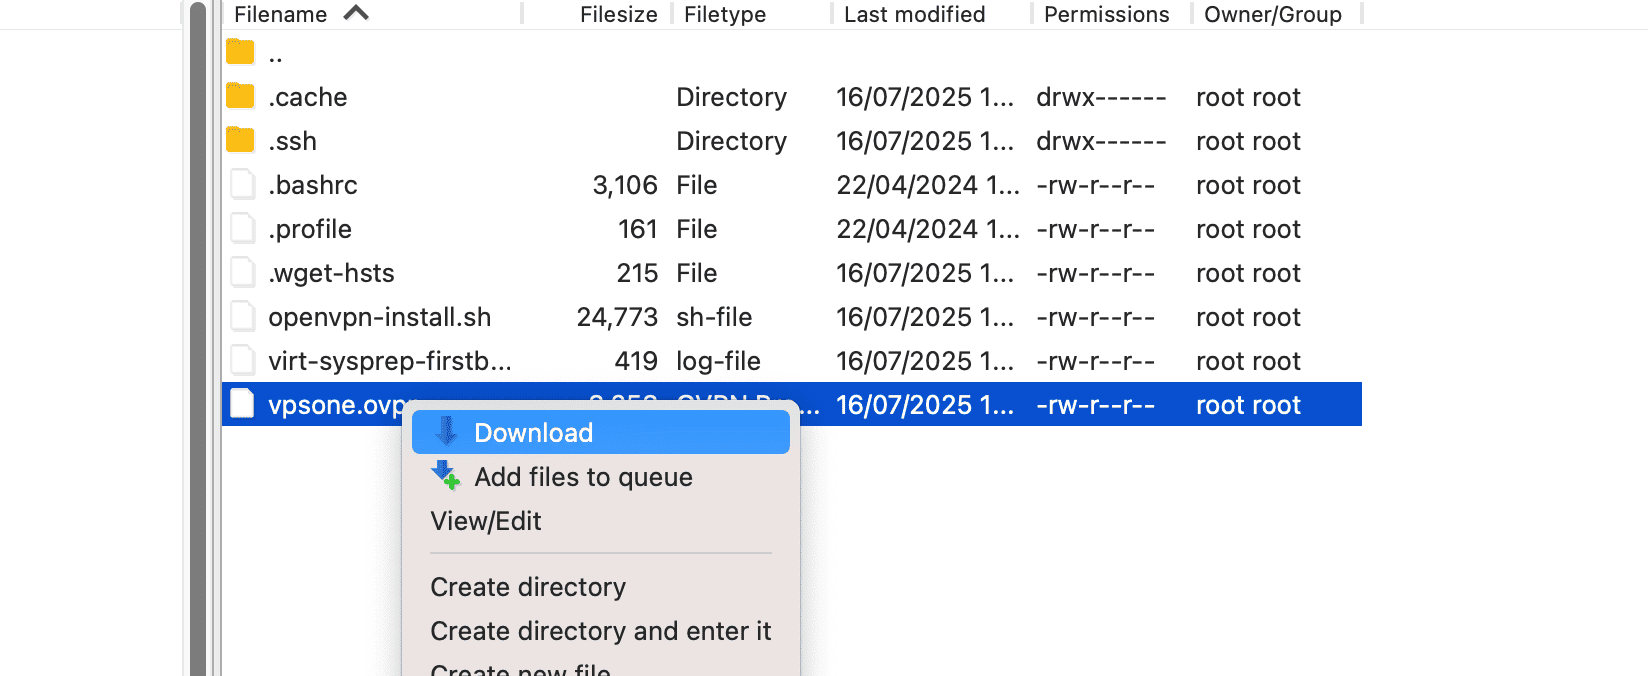
Once connected, navigate to the directory where the .ovpn file was saved — usually your home directory or the same folder where you ran the install script. Locate the .ovpn file, right-click it, and select Download to save it to your local machine.
To use this configuration, you’ll also need the OpenVPN desktop client. Install it, then simply open the .ovpn file with the app to connect securely to your VPS-hosted VPN.
Step 5: Connect to a VPN
Now that you've downloaded the `.ovpn` configuration file to your computer using FileZilla, it's time to connect to your new OpenVPN server. Locate the `.ovpn` file on your machine — it should be in the folder where you saved it during the download step. To establish a connection, simply double-click the file. If you have the OpenVPN client installed, this will prompt a window asking if you want to connect — click “Yes” to proceed.
Sometimes, the OpenVPN client may minimize to the system tray in the bottom-right corner of your screen. If you don’t see the connection window, look for the OpenVPN icon in the notification area (it looks like a computer with a green checkmark). Right-click the icon and select your configuration file from the list under “Connect.”
You’ll see a status window showing the connection progress. Once connected successfully, you'll receive a confirmation message reading something like "Initialization Sequence Completed," which means your secure tunnel is active.
At this point, all your internet traffic is routed through your VPS-based VPN, encrypting your data and hiding your real IP address. You're now securely connected — enjoy your private, protected browsing experience.
Mobile Setup VPN
Setting up OpenVPN on mobile devices is just as important as configuring it on your desktop — especially if you're on the go and want to keep your connection secure. Whether you're using Android or iOS, the process is straightforward and involves just two steps: installing the OpenVPN app and importing your .ovpn configuration file.
For Android Users
Open the Google Play Store and search for OpenVPN Connect — this is the official Android client, available for free. Once installed, you’ll need to transfer your .ovpn configuration file to your device. The easiest way is via email, cloud storage (like Google Drive or Dropbox), or directly from your computer using a USB cable.
Open OpenVPN Connect , tap the "+" icon, and select Import . Choose the .ovpn file you saved earlier, and the app will automatically parse the configuration. You’ll be prompted to enter a username and password if your server requires it. Tap Connect , and you’re good to go — securely browsing the web through your private VPS-hosted VPN.
For iOS Users (iPhone and iPad)
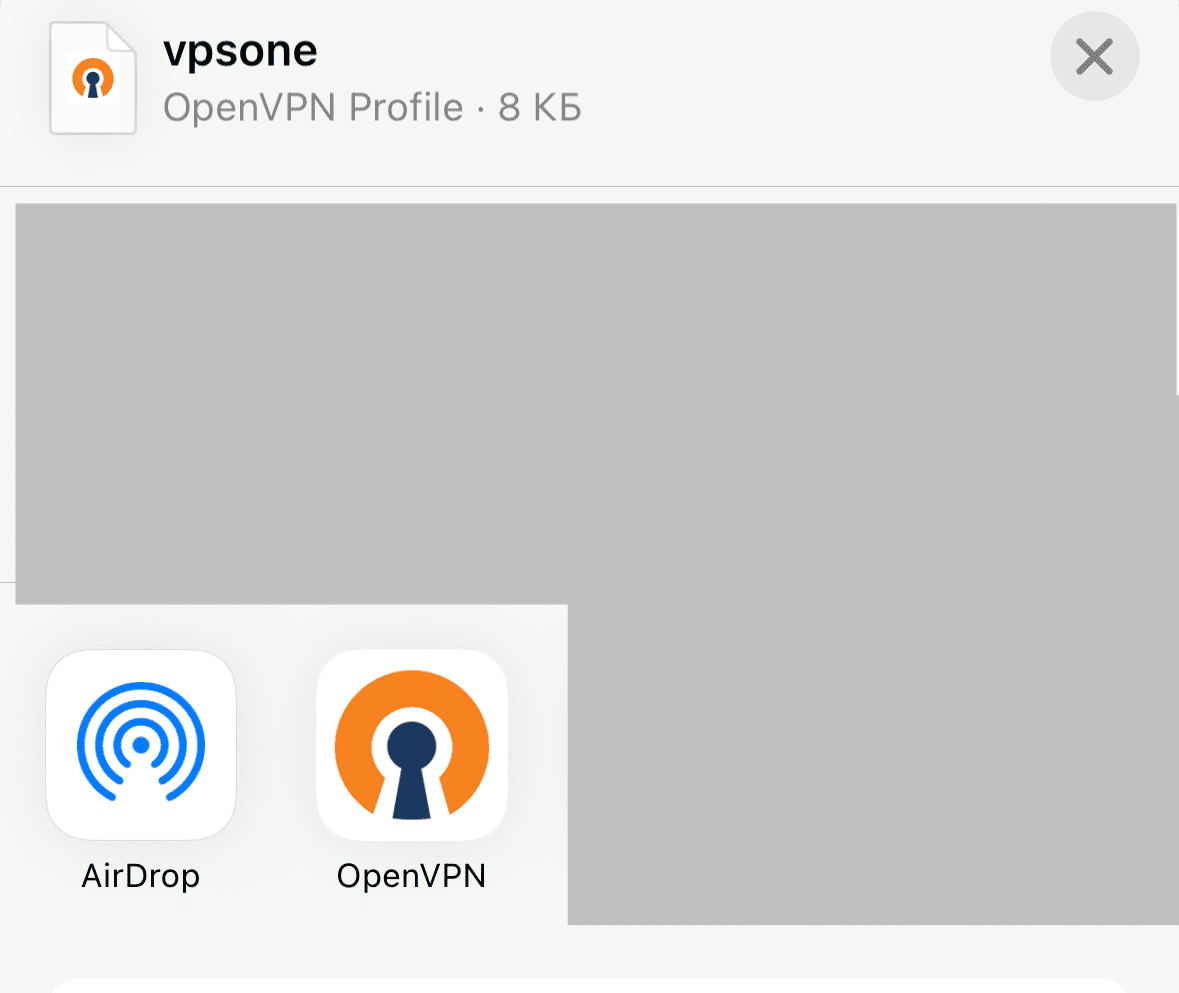
Apple’s App Store hosts the official OpenVPN Connect app as well. Download it here: OpenVPN Connect for iOS. Like on Android, transfer your .ovpn file to your device — you can do this via email, iCloud, or using the “Files” app.
Once you have downloaded the file to your device, go to “Files” and click on the .ovpn file. You will be prompted to open it via OpenVPN Connect. Tap Allow and then Connect. You’re now protected by your own private, encrypted tunnel — even on public Wi-Fi.
Frequently Asked Questions (FAQ)
Why Build Your Own VPN?
Setting up your own VPN gives you full control over your online privacy and security. Unlike third-party services, a self-hosted solution means no logging policies to worry about, no bandwidth caps, and no risk of data misuse. You choose where your server is located, what encryption settings to use, and how many devices can connect. It’s ideal for remote workers, developers, or anyone who values digital freedom. Plus, hosting on a VPS is cost-effective — often cheaper than premium commercial VPNs — making it a smart investment for long-term use.
Why You May Not Want to Set Up a VPN Over VPS?
While a DIY VPS-based VPN offers flexibility, it's not without downsides. First, it requires some technical knowledge — especially around Linux command-line tools, SSH, and networking basics. If something goes wrong, troubleshooting can be time-consuming. Also, unlike commercial providers, there’s no customer support or built-in redundancy. If your VPS goes down or gets blocked, your connection drops too. Additionally, maintaining strong security means staying on top of updates and patches — a responsibility that might be overwhelming for casual users who just want a plug-and-play solution.
Why Use a VPS for Your VPN?
Using a VPS (Virtual Private Server) for your OpenVPN setup strikes the perfect balance between affordability and performance. VPS hosting offers dedicated resources, root access, and reliable uptime — all essential for running a secure, always-on private network. You get to pick your preferred location, OS, and hardware specs, giving you more control than shared hosting. Plus, most VPS providers offer scalable plans, so you can upgrade as needed. Whether you're securing personal traffic or managing remote team access, a VPS-backed OpenVPN server delivers enterprise-grade protection at a fraction of the cost.
Conclusion: Setting Up a VPS-Based OpenVPN Server
Congratulations — you’ve successfully set up your own self-hosted OpenVPN server on a VPS. This gives you full control over your privacy, security, and network traffic without relying on third-party services. The benefits are clear: enhanced online anonymity, secure remote access, and the freedom to customize every aspect of your setup.
With your own VPS-based VPN, you're not just protecting your data — you're taking ownership of your digital life. Keep building, stay secure, and enjoy the freedom that comes with it.